Difference between revisions of "Building SourceMod Plugins With Visual Studio"
(→Before We Begin) |
m |
||
| (2 intermediate revisions by one other user not shown) | |||
| Line 1: | Line 1: | ||
By: Cleveland “[[User:Daedilus|Daedilus]]” Raymond | By: Cleveland “[[User:Daedilus|Daedilus]]” Raymond | ||
| − | |||
| − | |||
==Before We Begin== | ==Before We Begin== | ||
| Line 13: | Line 11: | ||
| − | '''This tutorial is for information purposes only. Please, download and install the .rules file from the link, SourcePawn for Visual Studio''' | + | '''This tutorial is for information purposes only. Please, download and install the .rules file from the link, [http://members.cox.net/cleveraymond/SourceModVS/SourcePawn.rules SourcePawn for Visual Studio].''' |
| Line 232: | Line 230: | ||
Happy Coding, Daedilus… | Happy Coding, Daedilus… | ||
| + | |||
| + | [[Category:SourceMod Development]] | ||
Latest revision as of 00:50, 18 January 2009
By: Cleveland “Daedilus” Raymond
Contents
- 1 Before We Begin
- 2 Setting the path to the SourcePawn Compiler Using Environment Variables
- 3 Creating the Visual Studio Solution
- 4 Adding the Visual Studio Project for SourceMod to the Solution
- 5 Configuring the Visual Studio Project for SourceMod
- 6 Creating a Custom Build Rule for SourcePawn
- 7 Adding Syntax Highlighting for .sp and .inc Files
- 8 Enable #include <file> Navigation
- 9 SourcePawn Custom Build Project Settings
- 10 Adding .sp Files to the Project
Before We Begin
This tutorial will walk you through the process of creating a Custom Build Rule in Visual Studio for SourcePawn. Once you have completed
the following steps, you will be able to create a Custom Build Rule for any tool that you may wish to integrate into Visual Studio.
To learn more about custom build rules, go to http://msdn.microsoft.com/en-us/library/03t8bzzy.aspx
This tutorial is for information purposes only. Please, download and install the .rules file from the link, SourcePawn for Visual Studio.
In order for all of us to be able to share our projects, it is important that we use the same Custom Build Rules. I have provided the following
link to the SourcePawn for Visual Studio Custom Build Rule file that was created during the process of making this tutorial. Save the file to
<Visual Studio Path>\VC\VCProjectDefaults and read through the tutorial. This link, MyPlugin, is where you can grab my test project.
Once you have downloaded and installed the .rules file, you will still need to set up the environment variables.
Note: .rules files are compatible with both, VS 2005 Pro and VS 2008 Pro (These are the only versions I have to test with.)
Setting the path to the SourcePawn Compiler Using Environment Variables
Bring up the “System Properties” dialog and press the “Advanced” tab and then press the “Environment Variables” button.
(To open the “System Properties” dialog, right click “My Computer”, choose “Properties” from the menu).
Press the “New” button in the “System Variables” group.
Name the variable, “SourcePawn” and set value to the path to spcomp.exe (without the trailing ’\’)
Do not include spcomp.exe in the path. ex. G:\Valve\HLServer\orangebox\dod\addons\sourcemod\scripting
If you want to be able to use spcomp from cmd.exe, add the newly created environment variable, %SourcePawn%, to the Path.
Creating the Visual Studio Solution
To create a blank Visual Studio Solution, select File->New->Project…
Name the solution and press OK.
Adding the Visual Studio Project for SourceMod to the Solution
To add the Visual Studio Project for SourceMod to the Solution, right click the Solution, Add->New Project…
Create a Win32 C++ Project. This will be used as the base for our SourceMod Plugin Project and press OK.
Choose “DLL” for the application type and check “Empty project” under additional options and press Finish.
Configuring the Visual Studio Project for SourceMod
To configure the Visual Studio Project for SourceMod, right click the Project, and choose “Properties” from the menu.
Note: I removed “Header Files” and “Resource Files” filters since they are no longer needed. You can setup your own folder filters to how you see fit.
(I modified my menu graphic to reduce the image size. “Properties” will be found at the bottom of the context menu)
Set the Configuration to “All Configurations” and set the properties for “General” settings as defined below. Under
“Project Default”, make sure the “Configuration Type” is set to “Utility”. This will prevent us from building a DLL.
(The next steps are optional. You can skip this and go to the next section, “Creating a Custom Build Rule for SourcePawn“.)
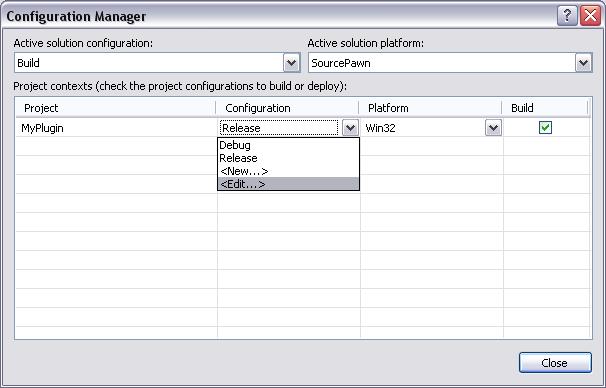
Press the “Configuration Manager…” button located at the top right and edit the “Active solution configuration”.
Remove the “Debug” configuration and rename the “Release” configuration to “Build”.
Edit the “Active solution platform”.
Rename the “Win32” platform to “SourcePawn”.
Edit the project’s configuration.
Remove the “Debug” configuration and rename the “Release” configuration to “Build” (Yes we already did this for the solution, not the project).
We are finished setting up the Visual Studio Project. Now on to configuring the custom build options for SourcePawn (Unfortunately you can’t edit the project’s platform to change its name).
Creating a Custom Build Rule for SourcePawn
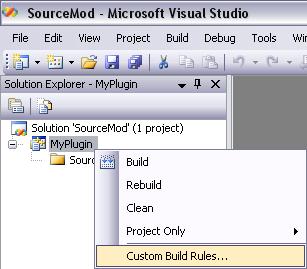
To create a Custom Build Rule for SourcePawn, right click the Project, and choose “Custom Build Rules…” from the menu
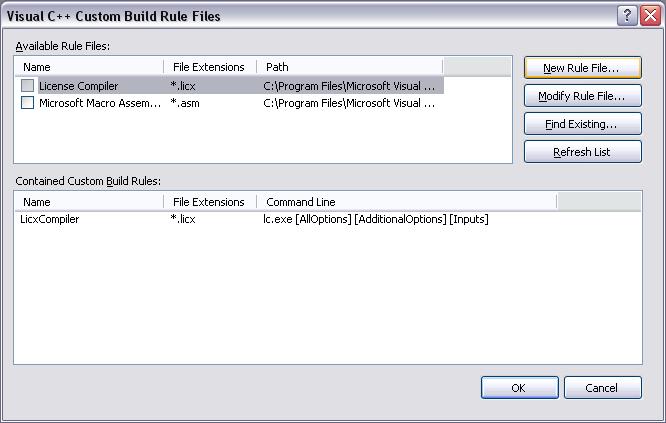
Press the “New Rule File…” button.
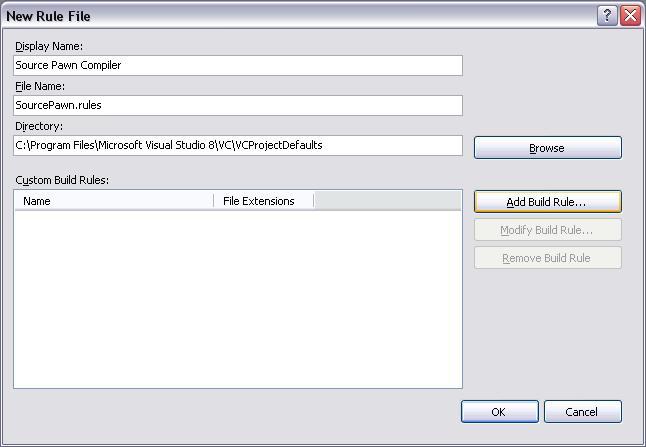
Fill out the “New Rule File” dialog with the settings below and press the “Add Build Rule…” button.
(Note: The default path for C++ .rules files is, “<Visual Studio Install Path>\VC\VCProjectDefaults”)
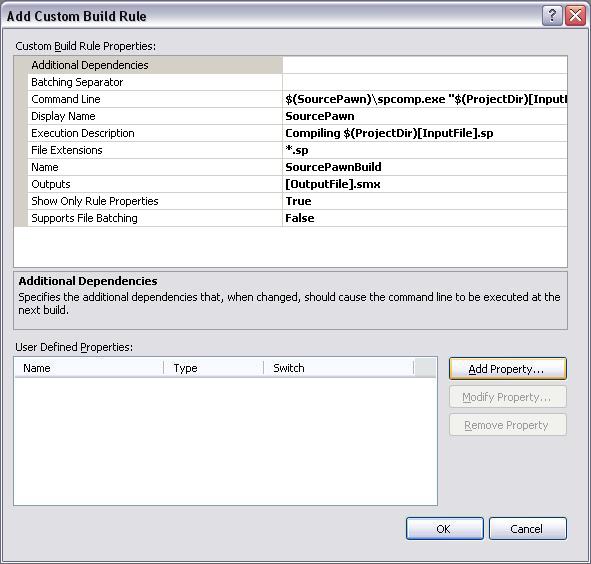
Fill out the “Add Custom Build Rule” dialog with the settings below and press the “Add Build Rule…” button. The “Command Line”
property has three entries separated by newlines. (Note: this is where we use the environment variable we made in the beginning)
$(SourcePawn)\spcomp.exe "$(ProjectDir)[InputFile].sp" [CmdLine]
if exist "$(ProjectDir)[InputFile].smx" move "$(ProjectDir)[InputFile].smx" "$(OutDir)\[OutputFile].smx"
if exist "$(ProjectDir)[InputFile].asm" move "$(ProjectDir)[InputFile].asm" "$(OutDir)\[OutputFile].asm"
Once you have filled in the settings, press the “Add Property…” button.
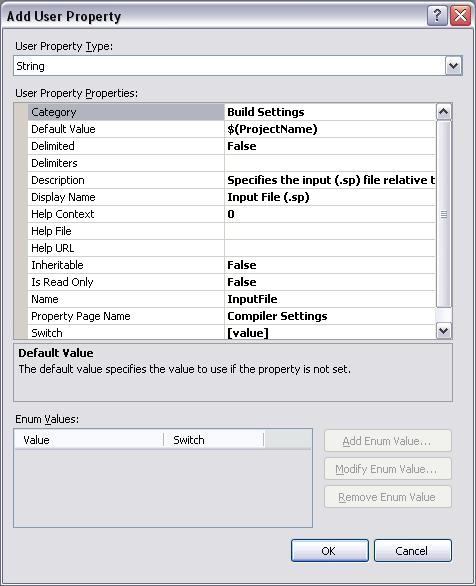
Fill out the “Add User Property” dialog with the settings below. This will allow us to specify the output .smx file name In the project properties dialog.
The “Description” property is set to: Specifies the input (.sp) file relative to the project directory. Do not include the file extension in the name.
Add another property. This will allow us to specify the output .smx file name In the project properties dialog.
The “Description” property is set to: Specifies the output (.smx) file name. Do not include the file extension in the name.
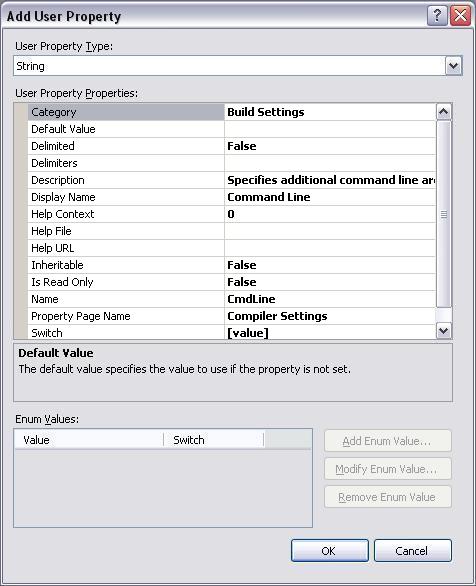
Let’s add one more property to handle additional command line options.
The “Description” property is set to: Specifies additional command line arguments. ex. -a
Keep pressing the ok buttons until you are back to the main window.
Congratulations you have setup SourcePawn to work with Visual Studio.
Adding Syntax Highlighting for .sp and .inc Files
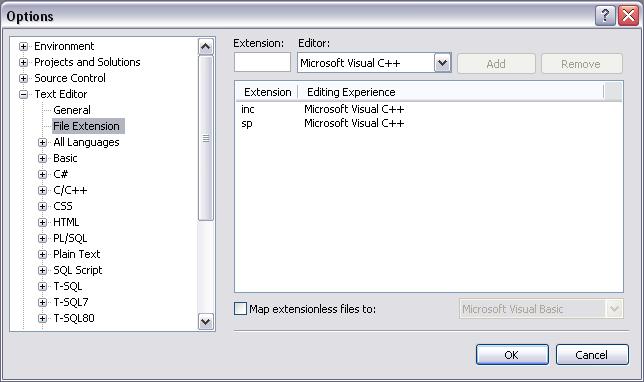
To add syntax highlighting, go to Tools->Options.
Select Text Editor->File Extension and add .inc and .sp to the “Extension” list. Choose “Microsoft Visual C++” for the editor.
Don’t close the “Options” dialog cause we need to tell Visual Studio where to find SourceMod’s .inc files.
Note: You will have to restart Visual Studio for the highlighting to take effect.
Visual Studio will try to open any included file if you right click the file name and choose “Open Document <file name>”.
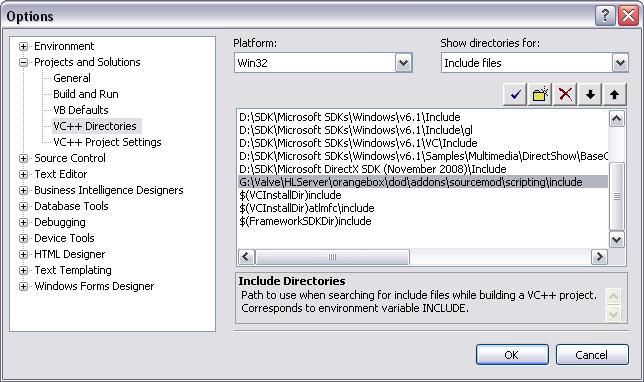
However, Visual Studio doesn’t know where to look for SourceMod’s .inc files. So, let’s tell Visual Studio where to find them. Select Projects and
Solutions->VC++ Directories and then select “Include files” from the “Show directories for:” combo. Press the ‘folder’ button and enter the path.
Note: Visual Studio will not navigate to an include file without the file extension. ex. #include <sourcemod> cannot be found.
This is because we are piggy backing on a Visual Studio C++ Project and Visual Studio only knows how to open .h and .hpp files.
Visual Studio will open the include file if you include the file extension: ex. #include <file.sp> or #include <sourcemod.inc>.
SourcePawn Custom Build Project Settings
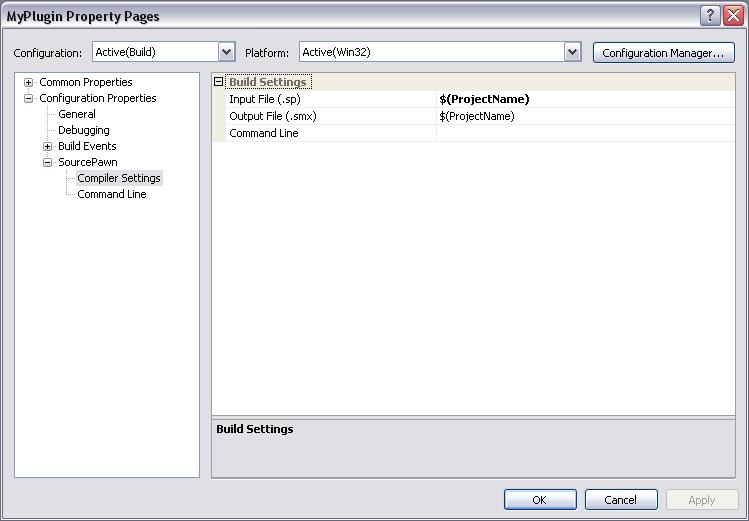
Reopen the project’s properties and check out the new “SourcePawn” options. The “Input File” and “Output File”, default to the project’s name. This means that I would have
to have a MyPlugin.sp file in the project’s directory and the build would produce a MyPlugin.smx file in the location defined Configuration Properties->General: Output Directory.
Adding .sp Files to the Project
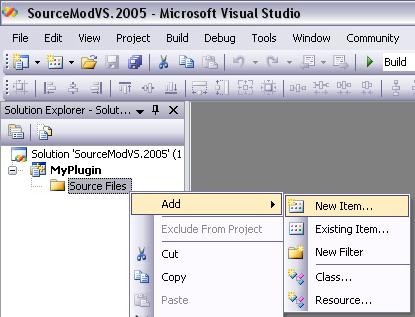
To add a new .sp file to the project, right click the “Source Files” folder filter and select Add->New Item from the menu.
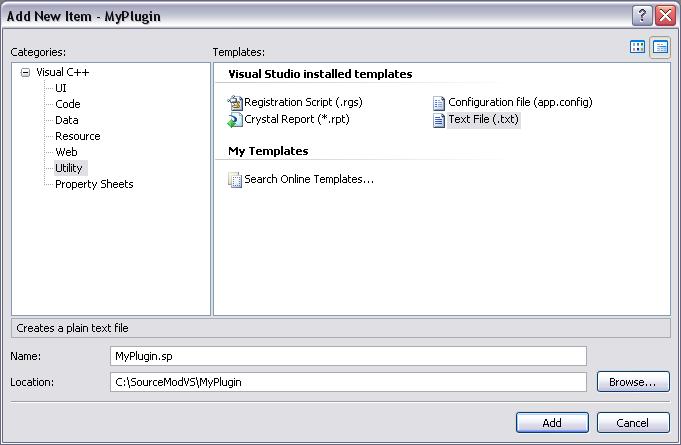
Select Visual C++->Utility: Text File (.txt) and name the file including the extension.
I will release a Visual Studio SourceMod AppWiz to go along with the Visual Studio C++ Metamod AppWiz. The app
wizards will allow us to easily create projects as well as provide wizards to add new .sp files. Once I get the AppWiz
completed for creating C++ SourceMod extensions, we will have a complete Visual Studio solution for creating plugins.
Happy Coding, Daedilus…


